Posted on 1 Comment

Tech deep dive

Many people have asked, what’s special about our Unleashed. It’s said that the devil’s in the detail, so we wanted to share some of the technical details that really set the Unleashed apart. It’s gonna get real nerdy, so buckle up 🤓

Where to start?

We’ve been working on the Unleashed with up to 8 developers at once, over the course of about 5 years! The firmware alone is comprised of around a quarter of a million lines of code! For all those unsure what this means: That’s A LOT!

The Unleashed has two main components – a Bluetooth module based on a Nordic chipset and a microprocessor from STM. The STM is in charge of communicating with the camera. It implements a USB Host instance, two serial protocols and GPIOs. The Nordic handles communication with the app as well as accessories paired directly with the Unleashed.

Here’s what’s special and what makes those ~250000 lines of code even more incredible: The STM only has 128 Kilobytes of RAM, and 256 Kilobytes of storage, and the Nordic just 64KB RAM, but a little more storage.

That means we can’t use any readily available image handling libraries or SDKs to control the cameras, and we have had to program everything ourselves from scratch. We’re programming bare-metal – i.e. we’re not even using any operating system! We’ve had to be extremely careful with our very, very limited resources, which has resulted in clean and efficient code – by necessity. And that translates to a great user experience for you! The sad thing is, that no-one will ever notice most of the things that we have taken so much care to get right. Because it just works as you’d expect it to! We usually only notice the things that don’t work as they should.

Since we’re so proud of our accomplishments, I wanted to use this update to highlight some of those things that you’d probably never notice.

USB protocol madness

Except for Nikon, who provide excellent documentation on the USB protocol they use, we have had to reverse engineer this protocol for all the other camera brands. This protocol is called PTP/MTP, for which there is actually a well defined standard. What we found really odd is that, for reasons we cannot figure out, every manufacturer has their own weird extension of this protocol, instead of utilizing it in a way that’s already defined by the standard. Again, Nikon is an exception here, and maybe that’s a reason they’re happy to publish all the details of their API. You have no idea how often, when we finally figured out how something works for a certain manufacturer, we developers collectively just shook our heads and asked “Why???”. That’s the reason why it’s not so easy to add new manufacturers to our compatibility list. The protocol was designed to cover most camera capabilities, and provide easy ways to extend it, but instead, every single one of the manufacturers (except Nikon) does their own thing with it.

But that’s just the basics. Once we figured out everything we could, there were still so many cases where we were left wondering why they couldn’t have just done this other little bit, too, and made everyone’s life easy. Instead, we’ve had to implement complicated workarounds for things that should have just worked in the first place.

Nikon video

After all the praise, here’s a Nikon oddity. For some reason, when starting liveview (e.g. for video recording) via USB, Nikon did not allow for the liveview image to be displayed on the camera’s LCD. I suppose they assumed most use-cases for remote control via USB were to add a bigger screen like a laptop, and therefore expect the liveview image to be transmitted via USB. That’s fine, but why disable it on the camera screen? Anyway, we found a really cool workaround for that: When the user starts a video recording from the app, we quickly change a setting deep in the camera menu, that allows us to start liveview by halfpressing the shutterbutton, and start a video recording by fully pressing the shutterbutton. We then proceed to turn off the USB protocol, and turn on a secondary protocol (more on that later), half press, then full press the shutterbutton, and within a very, very short time, can start video recording with the live-view image showing on the camera’s screen (and HDMI for those with external recorders). Upon stopping the video, we quickly change back the setting to what it was before. Pretty cool, eh?

Nikon’s 10 pin protocol & GPS

That secondary protocol I mentioned is one that no-one knows of, which we completely figured out on our own – and it allows almost all the functions over just the 10 pin port that the Unleashed N1 and N2 plug into. This means that the Unleashed N1 and N2 actually work really well without the USB cable, retaining almost the entire featureset, except anything that has to do with image data. So image review, gallery and the LRT autoramping algorithms don’t work, but everything else will.

This also allows us to still give you control over all the settings while we turn off USB to allow you to shoot video.

One downside to this protocol is that is uses the same pins that we need for the GPS protocol on Nikon cameras. So when it’s used with geotagging turned on, we have to quickly turn off that protocol, turn on GPS, and then take a photo. This adds a slight delay to your triggering, but that’s what the “GPS Priority” setting is for – if you prefer no delays, you can set to trigger immediately, at the risk of having some photos without GPS data.

The other great thing about Nikon’s 10 pin port is that we get lots of information about the camera’s state directly through these pins. Like whether the camera is turned on, the meter is currently on, etc. This helps us manage power-saving features really well!

Tap-to-trigger

But one very cool bit of information is exactly when the shutter opens and closes. This allows for several cool features. The simplest is “tap to trigger”. At first we translated pressing the shutterbutton in the app 100% to pressing the shutterbutton on the camera. As photographers we’re used to pressing the shutterbutton until we hear the clicking of the shutter, then we release. But in the first user tests we did, we noticed that 100% of all testers, whether they were die-hard photographers or not, did a single short tap on the shutterbutton in the app, and were wondering why the camera wasn’t taking a photo! Because that’s what everyone is used to from apps! And so we implemented a solution for this in our firmware: if we receive a tap, the Unleashed will press and hold the camera’s shutterbutton for exactly as long as required, until it senses the shutter opening – i.e. when the camera starts the shot! We then release the trigger so fast, that even with the camera set to continuous high, it will only take a single shot! Of course, if you continue to hold the shutterbutton in the app, the Unleashed will also keep pressing the camera’s shutterbutton until you let go, for burst shots or in-camera HDR bracketing.

Minimal darktime

This also allows us to promise the absolute shortest dark-time during timelapses! Most intervalometers default to fully pressing the shutterbutton for one or two seconds, some even to the interval you set minus 1 second. This results in darktimes of at least that amount of time, no matter how fast the shutterspeed is. With the Unleashed, it’s guaranteed to be shorter than the darktime of the camera itself (while it’s taking the photo). On top of that, most intervalometers half-press for a second or so before fully pressing the trigger, just in case your camera needs to autofocus. This adds yet another second to the dark time, and in most cases, as your exposures get longer, will result in you not being able to review the images at all on the camera screen. Since the Unleashed has the information whether the camera is set to autofocus or not, we can skip the half-press time entirely. And because you really shouldn’t be using autofocus on timelapses, the Unleashed app will even warn you about this while setting up the timelapse. There are a handful of cases where we do half-press in advance, for example geotagging is on, and we do everything possible to make sure GPS data is in each and every photo.

We have similar mechanisms on several other camera brands, and because we’re triggering via USB on those, we can often also just tell the camera to take a single picture, rather than telling it to half-press/full press the shutterbutton. In other words, no intervalometer out there can have a shorter dark-time than what the Unleashed can offer!

LED in the dark

While we’re on the topic of triggering: We have a nice RGB LED in the Unleashed to quickly tell you at one glance what’s happening in the Unleashed. Since one of the many strengths of the Unleashed is in night photography, even a really dim LED can completely alter an exposure, and illuminate an entire room! That’s why the Unleashed turns off the LED automatically for the entire duration of each exposure. Even when you trigger on the camera (on most supported cameras), we will turn off that LED. These are the kind of details, you’ll simply never see implemented in products that weren’t designed by or at least with photographers. And talking about the LED: While it’s idle, the Unleashed’s LED slowly pulses the LED in different colors, depending on the connection state. We tested various pulsing patterns, and all the most obvious ones simply looked wrong. By far the most natural looking one was a sine-curve. Remember we said we had limited hardware resources? Yeah. Trigonometric functions are always floating-point based, and require a lot of resources. Both in memory, to hold the complex functions, but also in execution time, as working with floating points alone is “expensive” and trigonometry even more so. Instead we scoured academic papers on the topic and found a very, very close approximation – the Bhaskara I’s sine. We then implemented that with integer logic, making it extremely efficient and just as beautiful as an actual sine curve. Pretty cool, eh?

There are so many of these kinds of details all throughout our firmware and apps, it would take days to write them all down!

Image decoding on the fly

There’s one pretty amazing part of our firmware that I can’t not talk about. Our image decoder. I don’t know if any of you have any idea about the resources required to work with images. It’s a lot. Usually the entire image gets loaded into RAM, then gets fully decoded into RAM, then calculations are done, and everything is discarded again. With JPEG images easily getting to 20Megabytes and the decoded version of that often being over 100MB, You’d think it’s an impossible task for our little Unleashed with its 128KB of RAM. And yes, with conventional methods it would be.

That’s why we wrote an image decoder from scratch, which can decode JPEG images, requires a mere 500 bytes of RAM, and can handle image data coming in in packets as small as 1 Byte at a time. All that while being performant enough to run at relatively slow processing speeds! That means we don’t have to save any of the image data, but can handle a packet of data, do our calculations and throw it away, We calculate and save the histogram data, and then use that to run the image-based algorithms for autoramping timelapses. And that happens once every interval. While we were at it, we also wrote a parser for EXIF data, so that we could get some valuable information about each image within the first few bytes of an image, skip to the really interesting parts, and only have to decode those parts, as opposed to decoding everything, and keeping only what interests us. That’s also how we can transfer the high-resolution previews without having to transfer the originals!

Previews with metadata

In fact, on most cameras, when we transfer a high resolution preview, we actually merge the EXIF data of the original with the image data of the preview, of course replacing things like X and Y resolution on the fly. This makes those previews even more valuable, as they still contain all your metadata, such as geotags, so if you save the previews to your iPhone’s camera roll, you’ll get to see your camera’s photos in the really cool Places album, where you can browse and find all your photos on a map interface.

We worked so much on our image decoder, and even implemented really, really efficient transcoding of jpeg images to reduce their size on the fly. Something we had hoped to be able to use for reducing the size of liveview frames, to be able to offer decent liveview over the low bandwidth of Bluetooth Low Energy. But sadly, after implementing all that, we hit other bottlenecks that prohibited us from being able to release this feature.

Our Baby

You probably read on our campaign page, that the Unleashed is not just another product out there, but it’s our Baby! Maybe now you have a little bit more of an idea of what we meant with that. We love the Unleashed and we’re pouring everything into it that we’ve got – to make it the coolest camera accessory that we personally always dreamt of!

Greetings from Berlin.
BACK TO INDIEGOGO

Posted on 1 Comment

Michael Ver Sprill (Milky Way Mike) Interview

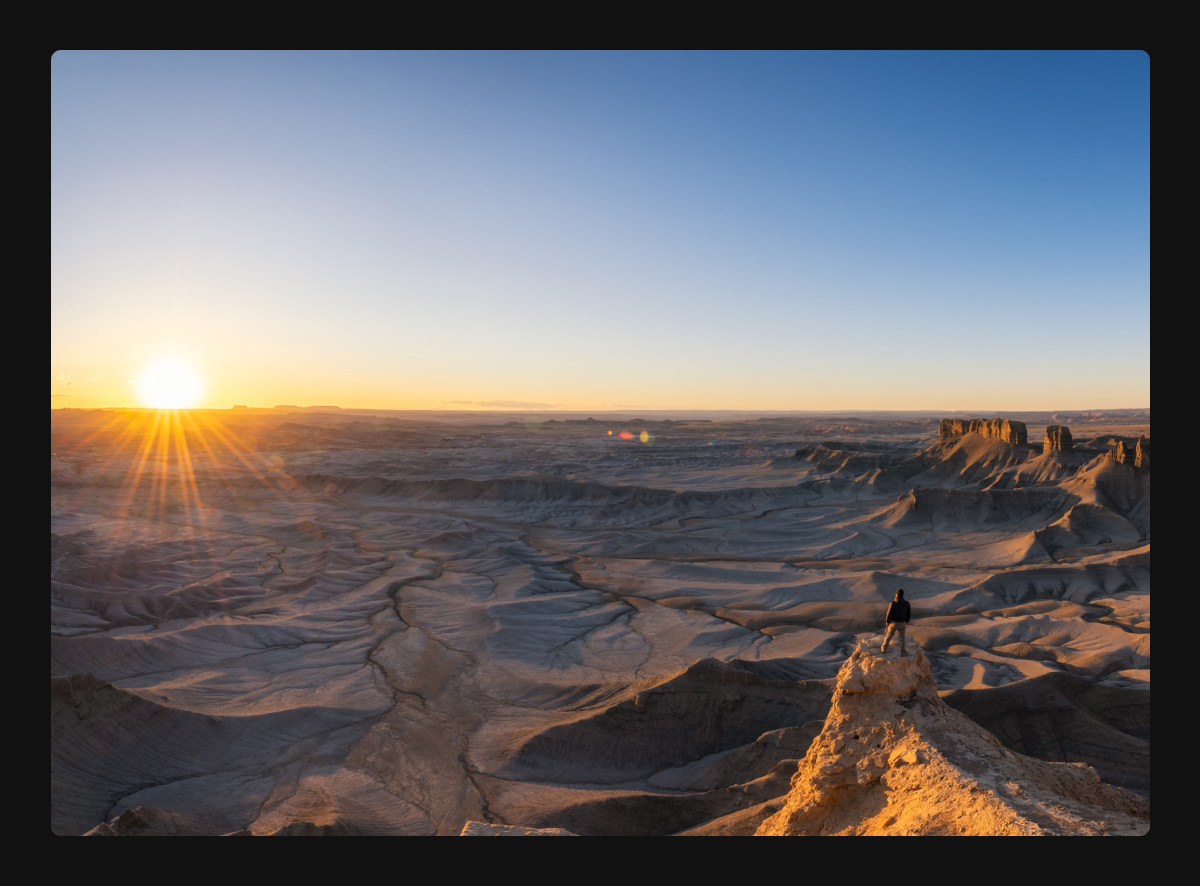
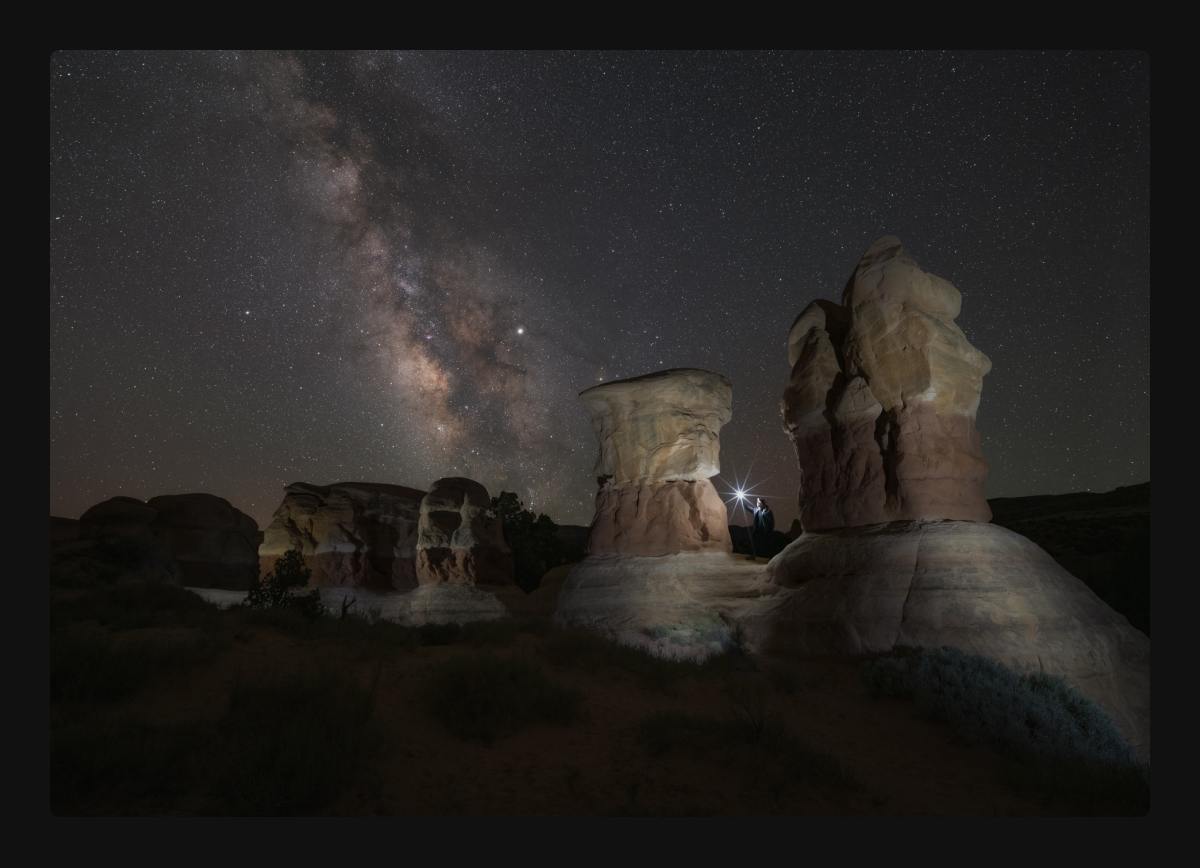
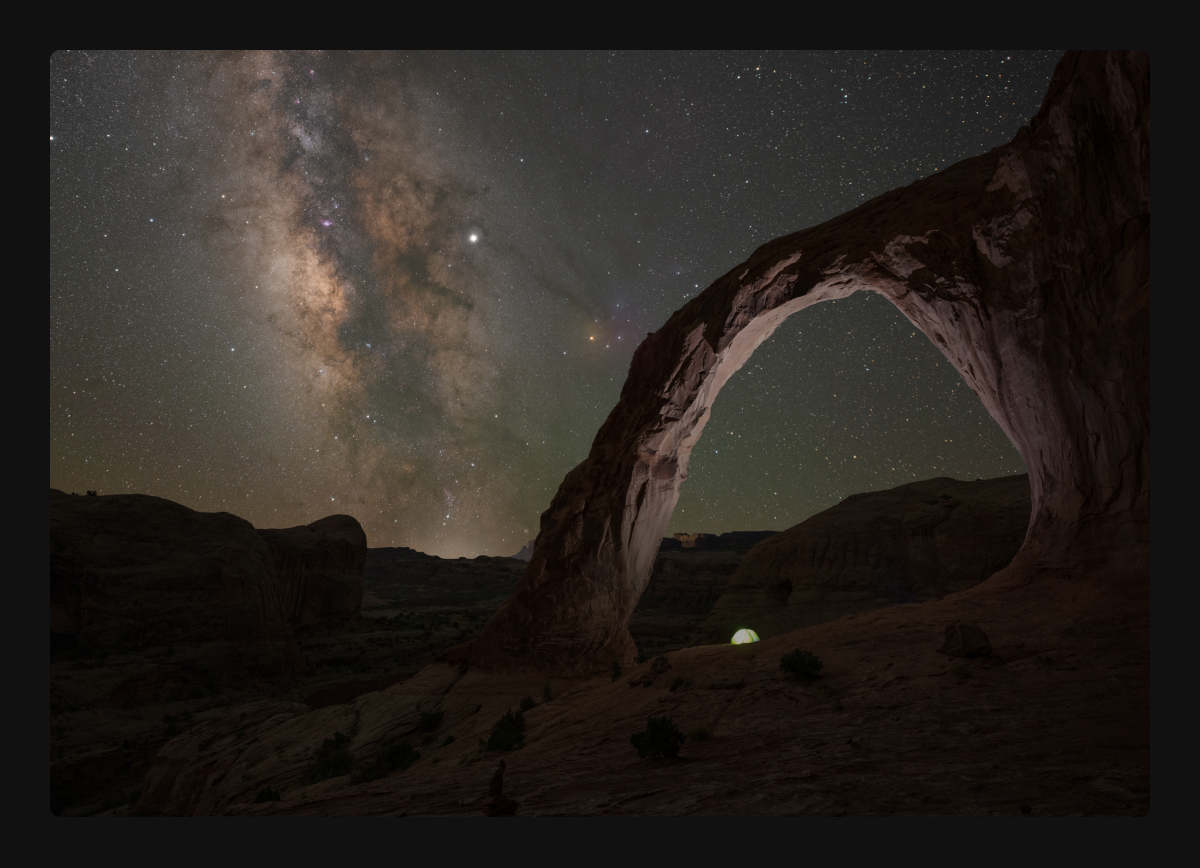
Photo by Michael Ver Sprill

Today’s blog post is a bit different than usual – we’ve interviewed the truly outstanding timelapse photographer and Unleashed user, Michael Ver Sprill, also known as Milky Way Mike. In this blog post you’ll learn about his journey to becoming a photographer and his tips for the best timelapses, from planning to shooting.

Michael Ver Sprill Headhsot

Quickly introduce yourself: Name, where do you live, favorite photographer, what camera do you use, what kind of photography do you like?

First and foremost, I would like to say thank you for this opportunity and allowing me to test out this fantastic piece of gear that Foolography has developed. My name is Michael Ver Sprill and I currently reside in North Brunswick, New Jersey in the USA. I follow a lot of photographers and it’s extremely hard to pick a favorite. As a landscape photography lover, I guess I would have to say that Max Rive is up there on my list of favorites. A few months back I recently traded in my Nikon DSLRs for the Nikon mirrorless system. So my main camera for still photography is my Nikon Z7 and I like to use the Z6 for time lapse work. As I started my journey to grow as a photographer I had dabbled with photographing just about everything from weddings, real estate, products, baptisms, birthday parties, newborns and portraits. This was all great for learning and gaining experience, but I naturally gravitated towards landscape and nightscape photography, since I loved to travel to the great outdoors.

What got you into night photography, specifically shooting the milky way?

About 8 or 9 years ago, I remember seeing an article which featured a picture of a Milky Way that had been photographed from a beach in New Jersey. Growing up in this state we are surrounded by light pollution from New York City and Philadelphia so we’ve kind of forgotten how beautiful the night sky can get when it is really dark. I got inspired from that article to give Milky Way photography a shot and I got hooked ever since. This obsession led to me travelling cross-country for the first time in my life so I could get a glimpse of some truly amazing dark skies out west, as well as photographing the unique landscapes we have all across America.

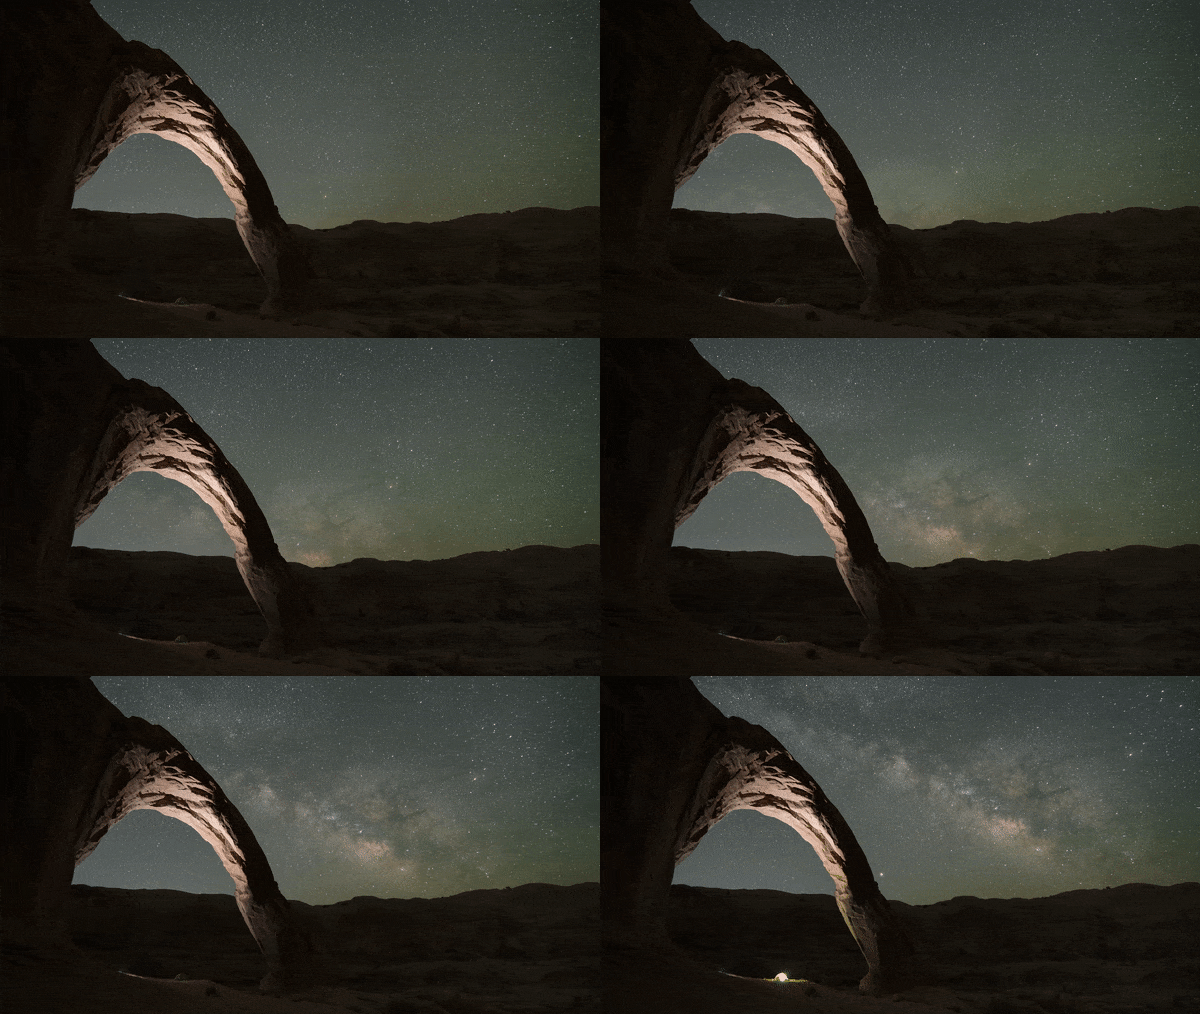
<Milkyway Timelapse by Michael Ver Sprill

How do you go about planning your shoots? How long does it take? When do you make a decision to go out?

I like to use Instagram and Pinterest to get inspiration for new locations which I add to my bucket list of places to photograph. Then typically I’ll check google earth so I can examine that location and see if it will work well as a Milky Way location. I’ll also use the app Photopills which allows me to check dates and times for when the Milky Way will be visible in that location during a New Moon phase when the sky is the darkest. Planning this out can take a few minutes to a few hours depending how complex it is to get to the location. Making the decision to go out is the hardest because of the weather. When I go out west it typically has less humidity and is very dry, so clear skies are more frequent compared to where I live in a coastal state. So usually my eyes are glued to the weather channel waiting for clear or mostly clear nights to become available and that will dictate my decision to go out.

Photo by Michael Ver Sprill

What camera accessories are essential and what are nice add-ons (for every hobby photographer and night photographers)?

As a landscape and night photographer, a tripod and remote trigger is an essential part of gear that I need to make my photos possible. Typically I am taking photos during golden hour, blue hour and at night, so I need to keep the camera very still as I take long exposures with the help of a remote trigger like Unleashed. Great add-ons would be ND or Graduated filters which allow you to get creative with your long exposures especially during sunrises and sunsets. Another great add-on that comes in handy for me is a Nodal Slider which allows you to pivot from the camera’s lens instead of the camera’s base. This helps prevent parallax when doing panoramas both during the day and at night when doing Milky Way Panoramas.

How do you get the most out of your (night) long exposures? Any tips?

Since we often have to push our ISO when photographing at night, a process called stacking has become extremely helpful with long exposures and Milky Way photography. There are programs like Sequator (for PC) and Starry Landscape Stacker (for Apple) which help track the stars and stack your night photos which essentially reduces the noise by averaging the photos together. I have numerous tutorial videos on Youtube which explain this in more detail to help new night photographers. I also recommend a fast wide angle lens to allow you to gather in more light. One of my new favorite lenses is a 20mm 1.8 prime which is extremely sharp, gathers in a ton of light and perfectly wide for landscape or nightscape photography.

Photo by Michael Ver Sprill

What compositional tips do you have for making your timelapses more interesting?

I’ve found that the most important thing with time lapse photography is not necessarily the composition, but actually having elements that show movement. Typically cloudy sunrises and sunsets make for great time lapses. If the sky is clear, then maybe you want to show the movement of shadows drifting across a landscape. It’s all about showing the viewer the movement that happens during a span of time. Now typically when I set up a composition during a timelapse I usually follow the rule of thirds. I tend to keep ⅔ of the composition on the most interesting part of the scene that shows movement with ⅓ on the less interesting part. So for example with a Milky Way time lapse I will tend to keep ⅔ of the sky with ⅓ foreground.

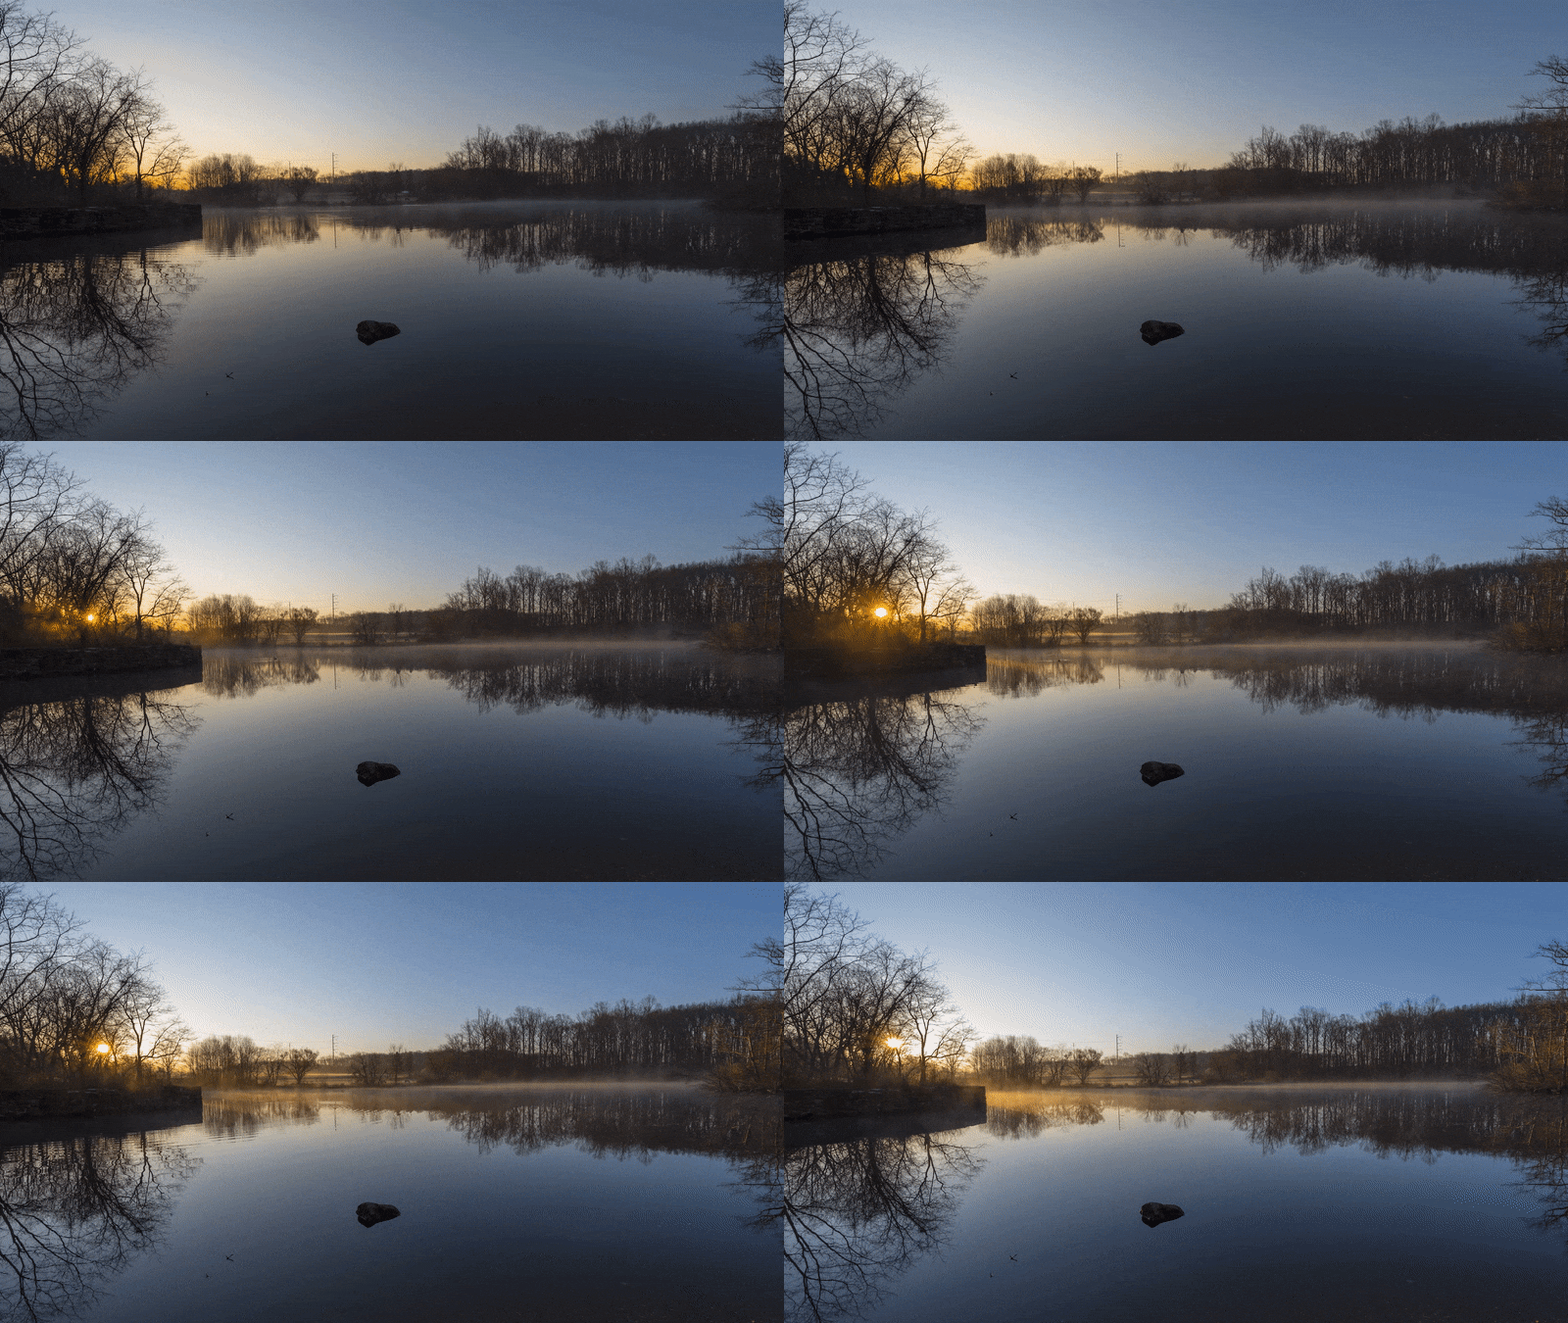
Sunrise Timelapse by Michael Ver Sprill

What photography projects do you have in mind to do next?

I’m about to head up to Acadia National Park in Maine to capture a Milky Way photo from a location that I believe has not been done before. I’m hoping to document that trip in an upcoming vlog for people to see the behind the scenes footage and my editing process.

We’d like to thank Mike for sharing his insights with us and being part of our Foolography Ambassadors team. Be sure to check out his instagram and website to see more of his amazing work!

Posted on 1 Comment

5 Ideas to Use Your Camera Creatively at Home

As photographers, being stuck at home can feel very limiting – but it shouldn’t mean that you can’t take any photos at all! If you usually shoot events or are limited in your options for nature photography, try something new at home. Use the equipment you have and put it to use for a different purpose than usual. Try food or product photography, pet portraits or document a new hobby you might be learning at the moment. In this article we’d like to give you some inspiration to keep busy and creative with your camera while staying home!

1. Combine learning a new hobby with photography

It seems like everyone is starting a new hobby recently to make all the time spent at home more fulfilling. Since many of us no longer commute to an office, there are a few hours more per week to devote to learning a new skill: be it a new form of exercise, a manual skill like sewing, woodwork or gardening, (re-)learning an instrument or arts. If you feel like you have nothing to photograph since you can’t go places, try documenting your learning journey. This will not only give you new subjects to shoot, but it’s also satisfying to visualize your progress this way. Here are some examples:

  • Learning to cook or bake creates great opportunities for food photography – going way further than the occasional phone shot at the restaurant! Try recording the entire process of making the dish to the final result.
  • Creating something with your own hands can be so satisfying… and the photo opportunities a new manual skill or a form of art can give you are unlimited! You could even get into product photography if you want to sell some of your creations.
  • Take photos every week to document your improvements in any form of exercise you are practicing. This works especially well for things like flexibility training or learning a certain yoga pose.

2. Learn from constraints

Since most of us are stuck at home, unable to travel to photogenic locations or do photo-shoots with people, it’s easy to feel like you have nothing to take pictures of. Normally you would have a stunning landscape or a model as an inherently interesting subject. Creating visual interest in your own home will definitely be harder, but honing the skill of perception can make your future shoots a lot easier.

For the challenge: choose one room of your home that you will take all pictures in. Take a close look around you to identify possible subjects. Then try to take as many creative pictures of the environment, working with different perspectives, lighting, negative space, and composition. You can also spread this over the day and notice how the natural lighting conditions change the look and atmosphere of your pictures. Limiting yourself like this can really push your creative boundaries since you have to work with what you’ve got and sharpen your eye for interesting compositions.

3. Shoot (self) portraits at home

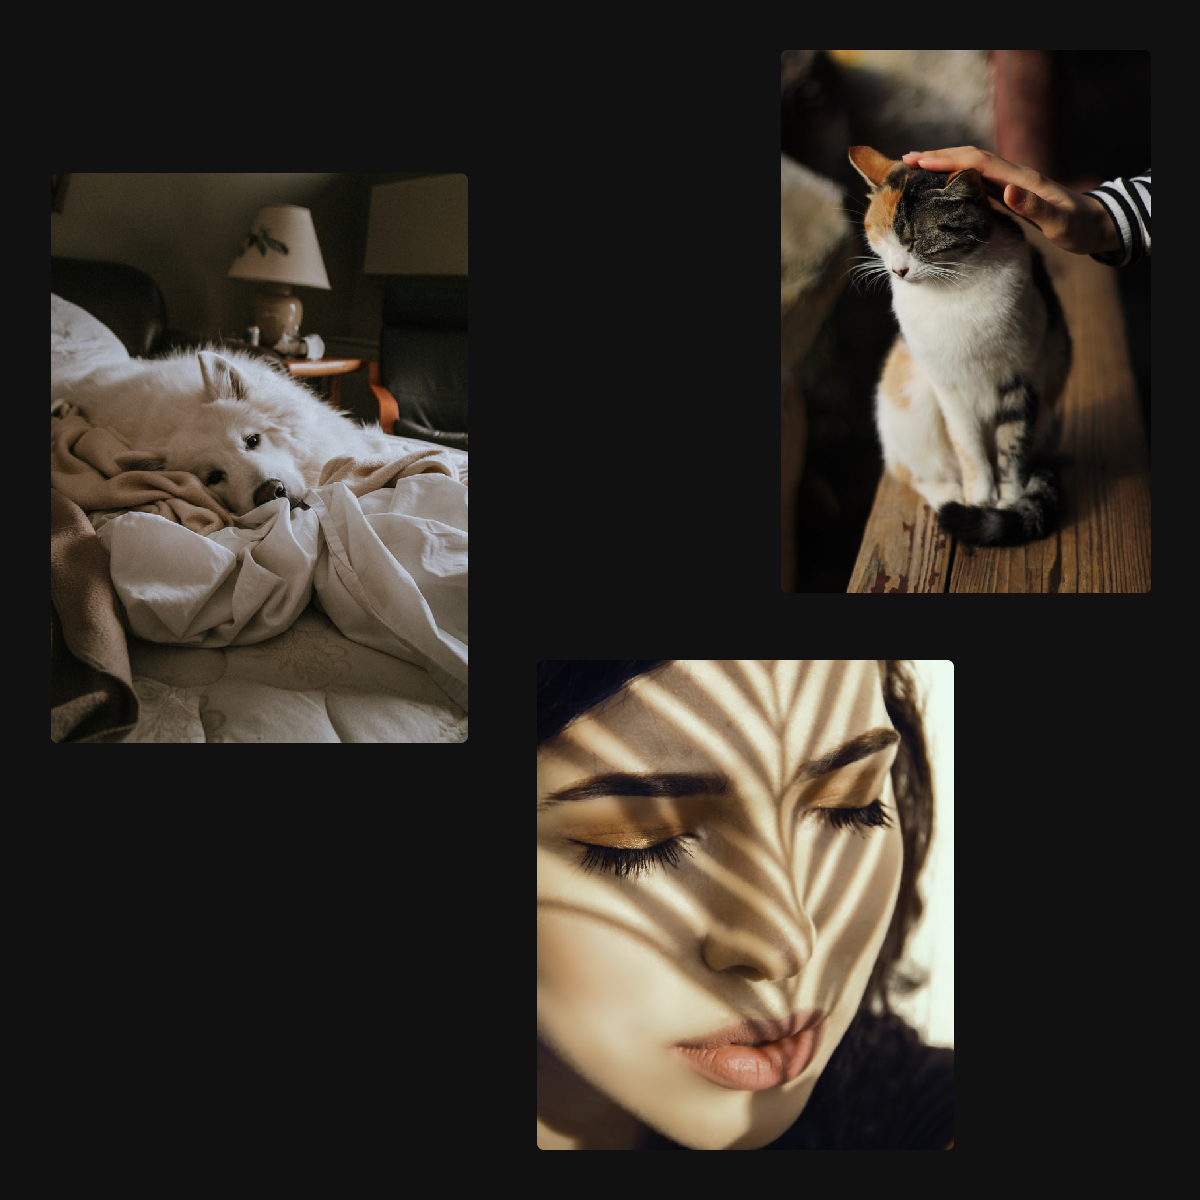
For many people, more time at home means more family time. Why not use the opportunity to take some family portraits? You can also try practicing new techniques on your family members, partners, pets, room mates, or if you live alone – on yourself. YouTuber Sorelle Amore does a great job on explaining how to take the best “advanced selfies”. Check out her tiny room challenge or this one in a small town for inspiration. Taking portraits of yourself is quite tricky so having remote control over your camera will be extremely helpful. Here are a few ways to add some creative spark to your photos:

  • use props like glasses, phone screens, prisms, glass balls, kitchen utensils like sieves, knives, etc. in front of your lens to create interesting flares and shadows
  • use fabrics you have at home like curtains, sheets, scarves or blankets as backgrounds, in the foreground, draped around you or even as clothes
  • project a picture or pattern over the subject using an overhead projector

4. Time lapses & long exposures at home

Sure, you have less opportunities to travel at the moment. That shouldn’t necessarily keep you from creating stunning time lapses and long exposures, though. You may still be able to capture magnificent sunsets or sunrises from your window or garden. If you live in a highrise or the middle of the city, its neons and passing cars lend themselves perfectly to long exposures. Or change things up a bit and record time lapses indoors: meal prep, food baking in the oven, a satisfying decluttering session, your plants growing, someone making art… the possibilities are endless!

5. The Airbnb Photo shoot

Using the extra time to deep-clean your home seems to be trending at the moment, so why not use the opportunity to do a little photo shoot and get some beautiful shots of your living space? Pretend you want to put your apartment on Airbnb or get featured in an interior design magazine − make your place look immaculate. (Maybe it can also motivate you to tidy up in the future, once it no longer looks like in the pictures ;) ) Get creative with your shots by using wide angle lenses to get sweeping shots of the room and some more detailed shots with a tighter lens. Use a macro lens for details usually overlooked to get some cool abstract shots. If your apartment doesn’t have great natural lighting, this can also be a good challenge to practice your low light photography skills.

We hope some of these ideas inspire you to use your camera creatively at home!

Posted on Leave a comment

Unleashed Journey Pt. 1: Crowdfunding – Why and How?

Crowdfunding: How to run a successful campaign

30th of September 2016: Against all odds, the Foolography office in Berlin Mitte is filled with over 50 people. Not employees, but friends and family who want to celebrate the successful funding of the new Unleashed on Kickstarter. 186,723 €, more than 300% of the initial funding goal. All achieved by a couple of people committed to a dream and passion. Honestly, we could have never imagined of the amount of support we got – from the people around us, and especially from the Kickstarter backers and supporters who also believed in what we were trying to achieve.

11th of April 2018: Looking back today, we’re still amazed by the journey we are on and the development of Foolography and its employees. Being finally able to ship the Unleashed in a couple of weeks, we decided to give people the opportunity to be part of that journey: The journey of the Unleashed.

In this three part series we want talk about crowdfunding, what it’s like to be and run a hardware startup and where we see Foolography in a couple of years. The goal is to give you valuable insights, tips, dos and don’ts and hopefully encouragement to chase your dreams and hang in there – whether you have or want to start a business, are a photographer yourself or just interested in what we do and wondering how we do it.


WHY

Why crowdfunding?

This is the question we asked ourselves two years ago when we decided to launch a Kickstarter campaign for the new Unleashed – a smartphone DSLR remote control. And to be honest: We’re still asking us this question today from time to time. Clearly, crowdfunding is one of the best things that ever happened to help you to turn ideas into reality. Kickstarter puts it this way: “Our mission is to help bring creative projects to life.” However, what many people don’t know or at least underestimate: Doing a crowdfunding campaign is a lot of work – before and after it. Especially after it.

Maybe you didn’t know, but there is a Berlin hardware startup community. And many of those startups actually started off with a successful crowdfunding campaign. This is great and was especially helpful to us when we were playing with the idea of doing a Kickstarter campaign ourselves. We met with people who were further along the journey and absorbed all infos and insights we could get. Even though Foolography has been around for a couple of years at this point, doing a crowdfunding campaign was definitely a step into the unknown.

After a couple of weeks we had our “whys” and essential reasons why crowdfunding could be helpful and, what is even more important, why it might be the right next step for us. This is why we launched the new Unleashed on Kickstarter:

1. Money for production.

Marc Andreessen, a pretty famous investor, once said: “Hardware is hard”. Well, we couldn’t agree more. Building a technology hardware company is by far much harder than building a software company. There are many reasons why that is and one of the biggest is: In order to deliver the product to your customer, you need to produce it first. Meaning, physically produce it. Including finding the right parts, producing the PCB, the casing, the packaging, taking care of the assembly and much more. All things you don’t really have to worry about when having a digital product. And those things mentioned are usually pretty expensive and most important: You have to pay for it in advance before you are actually able to sell your product. So crowdfunding definitely is a big help when it comes to production of your product.

2. Proof of concept.

Whenever you have an idea for a new product it is wise to find out if there is a market for it. What do other people say about it? Are people already signing (or lining) up to get your product? And with people I don’t mean your grandparents or close friends. I’m talking about people who don’t know you but who could potentially be your future customers. Do you have a proof of concept? The cool thing about a good proof of concept is that it not only helps you to understand whether there are people out there who want to have your product, but to understand whether people like the way and method how you present and sell your product. See, the proof of concept is not a single yes or no. It’s a commitment to pay for what you offer. And usually that happens – yes, because of the greatness of your idea – but also because of how you marketed and sold it. So a proper proof of concept not only confirms your idea but also helps you to find a the right go-to-market strategy. Crowdfunding definitely is a good tool for that since people are supporting you not only with words but with money.

3. Building a community.

Having a community (or even customers) when you start shipping your product is one of the best things you can have. It literally is a kick-start. You will have people talking about it, testing it and in best case recommending it. And in the end, this is something worth more than thousands of online ads: People that recommend and advertise your product to their friends and family, in their own personal and unique way.


HOW

How to do crowdfunding?

You can find thousand of infos, you can read hundreds of articles and you can talk to dozens of people on how to approach this whole crowdfunding thing. And to be honest, I believe all of that is good and necessary. Because as it is with most things in life: Preparation is the key. So you actually can prepare a crowdfunding campaign and you actually can increase your chances of getting funded. We did all of the things listed above and they definitely helped us. But nonetheless, people still keep asking: “What are the biggest tips you can give me, when I want to do a crowdfunding campaign?” So here are the top ten of, I believe, most important things to consider and prepare well when doing a crowdfunding campaign.

1. Have a working prototype.

Oh yes. Something that is super important (probably the most important) and non-negotiable. Before you go public on a crowdfunding platform, have a working prototype of your product ready. (This is something we will discuss more in detail in part two of this series.)

2. Talk to people who (successfully) did it before.

I mentioned this before and cannot emphasize it enough. Reach out to people who did a crowdfunding campaign before and get as many insights as possible. Come prepared and ask questions.

3. Have a strategy, including a Plan B and C.

This seems to be an obvious thing to do, but it is those simple things that you forget or don’t do properly. Take enough time to write down your vision, goals and strategy. Try to sharpen your product’s USPs, verbalize them and get feedback.

4. Have a CI. Or at least PI (Product Identity).

It should be clear who you want to reach out to and what people perceive when getting in contact with your business or product. This includes a logo, slogan and everything you learn in Marketing 101.

5. Have a website or landing page outside of Kickstarter or Indiegogo.

You could argue about that point, but I personally think it’s necessary in order to be able to provide further information, have an official point of contact and most importantly to build trust.

6. Have a (large) newsletter list before.

This is something that can determine whether your campaign is successful or not. Having people that are ready to support you at the very start will push you forward in many ways. One way could be that the faster you get a lot of support, the more you become interesting for press or the crowdfunding platform itself. And this in return will generate awareness of your campaign.

7. Have a good video.

When looking for tips on the internet this is one of the things you will find the most. And yes, it’s very important. But what makes a good video is such an enormous topic for itself. Write us if you want further infos. ;-) Maybe we do an own article just about that – let us know in the comments if this is something you’re interested in.

8. Spend time on an appealing crowdfunding page.

The page of your campaign probably is the first or second point of contact for your potential customers. Make sure it’s visual, appealing and nicely structured. For example, remember to not overload it since most people will only have a look at the first few paragraphs and just a few will scroll down to the bottom.

9. Have a PR strategy.

This is something that certainly needs quite a bit of preparation in advance and is something we definitely could have done better: Have a good press release prepared and a well chosen list of people ready that potentially could write about you. If possible send product samples to those people beforehand.

10. Think about (but not necessarily do) online advertisement.

We didn’t do it, but could have done it and certainly would have gotten a bigger funding. Have a strategy and decide whether it’s helpful and possible due to production, pricing and production cost.


Well, this is it for now. There are certainly more things that are important to consider when thinking about doing a crowdfunding campaign. These, however, are some things that we learned along the journey and are telling most of the people who ask us about our campaign. We hope this gives you a little insight and helps somebody. We’ll continue with this series another time and will then talk about what it’s like to build hardware and what challenges can occur along the way – and how to overcome them.

Make sure you follow us on Facebook, Twitter and Instagram to get exciting news on Foolography, photography, videography and other interesting topics. Scroll down to subscribe to our quarterly newsletter to stay up-to-date and become part of the Fools. ;-)