Many people, including me and some of our customers have had problems getting track-logs off of their GPS Loggers, because most manufacturers only provide Windows software for their devices, and usually not even that is very useable. This was one of the reasons why I created our Unleashed in the first place: To get rid of the struggle with bad/non-existant software, and geotag images directly in camera. Many years later, nothing has changed. Still no Mac-support from most GPS Manufacturers, and very little Information on the topic to be found on the Internet.
We bundle Holux Bluetooth GPS-receivers with our Unleashed, the M-1000C or the M-1200E. These are great little devices, especially together with our products – the combination allows wireless direct geotagging via Bluetooth®, but will store a track with up to 200,000 waypoints as well. That way, if you want, you can get a track of an entire hike/journey, as well as the already geotagged images you took on that trip.
But you need to get the data off the Holux first, and that has been a problem for most Mac users.
So, I’ve put together step-by-step instructions of how to get it to work:
- Download the free software BT747 at sourceforge.net/projects/bt747. On their home-page they also offer a “Desktop Version” webinstall, but that has not always worked for me, whereas the zip file has worked every time.
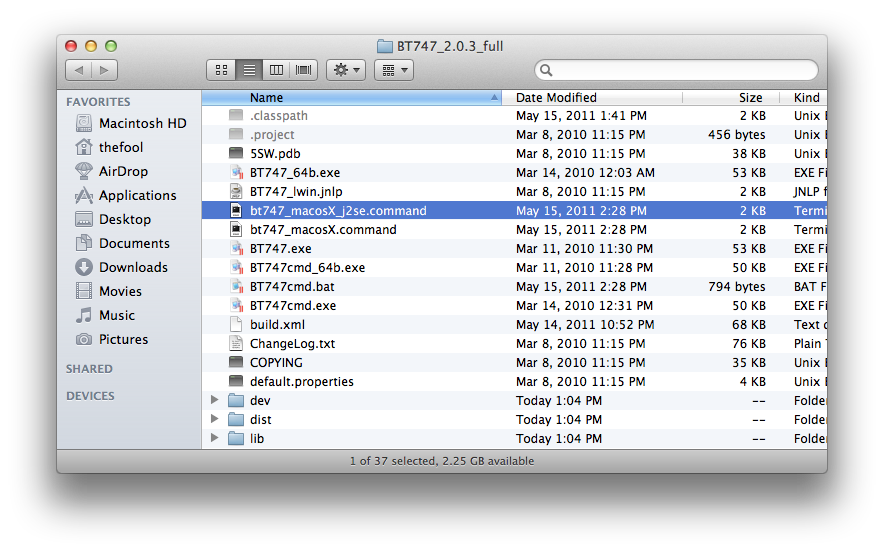
- Move the entire folder to your Applications folder, and inside, start the file “bt747_macosX_j2se.command”, to launch the application.
- Plug in your Holux M-1000C or M-1200E. Luckily, Mac OS X already comes with the drivers you need. On Snow Leopard (10.6) or older Mac OS X versions, you might get a window prompting you to configure your new network device:
Just click “Configure”, then “Apply” and close the window (you can click on Cancel, but the window will pop up every time you plug in your GPS).

- In the menu (not in the typical Mac OS X menubar, but rather along the top of the window, typical for Windows applications), click on File -> Populate Serial Port Menu.
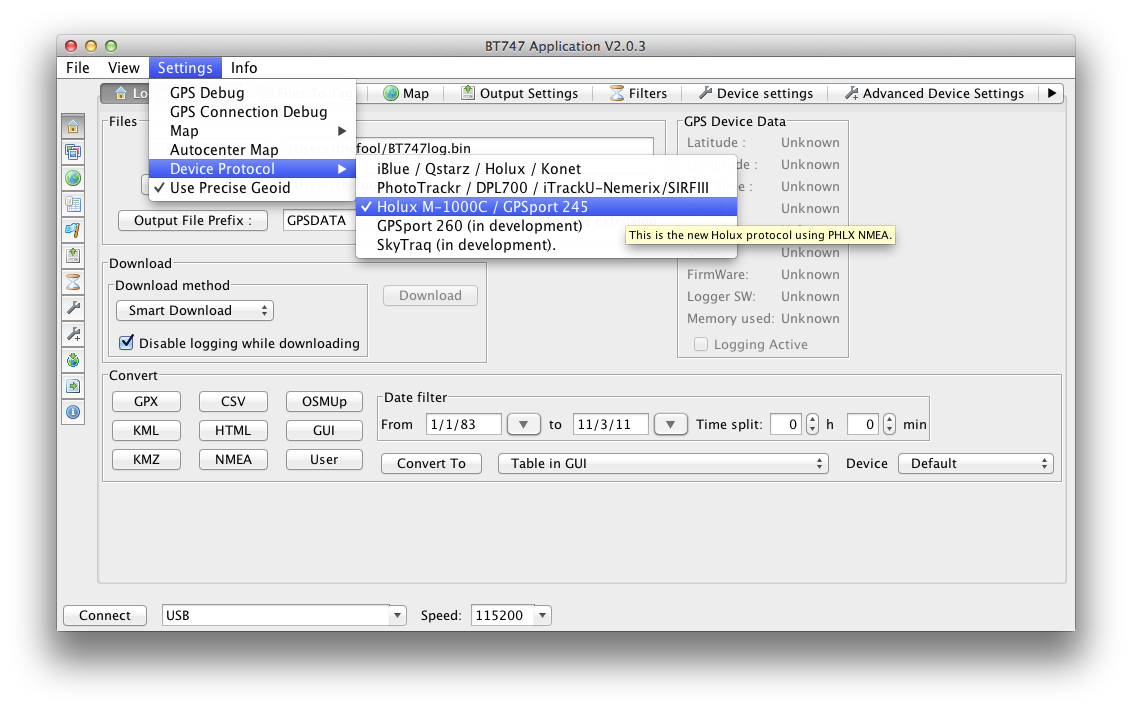
- Also in the Menu, click Settings -> Device Protocol -> Holux M-1000C / GPSport 245
- At the bottom of the window (next to the Connect button, where it says “USB”), choose your serial Port, which should be just below all the COMx Ports, called /dev/cu.usbmodem1d10 or something very similar.
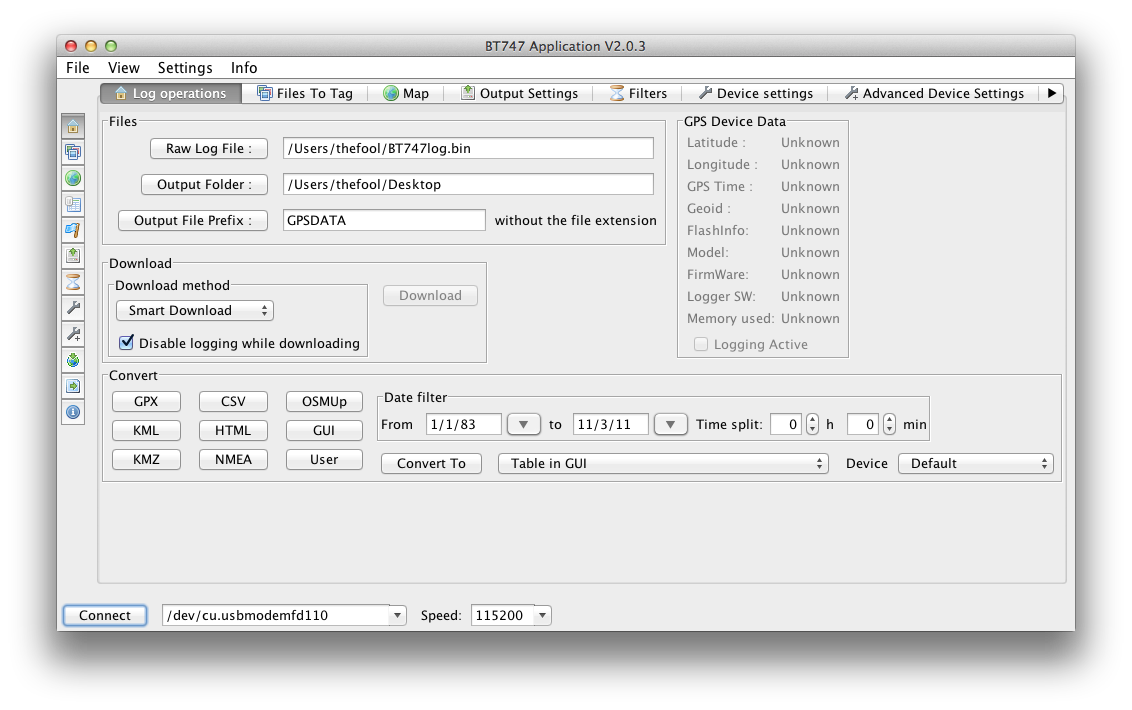
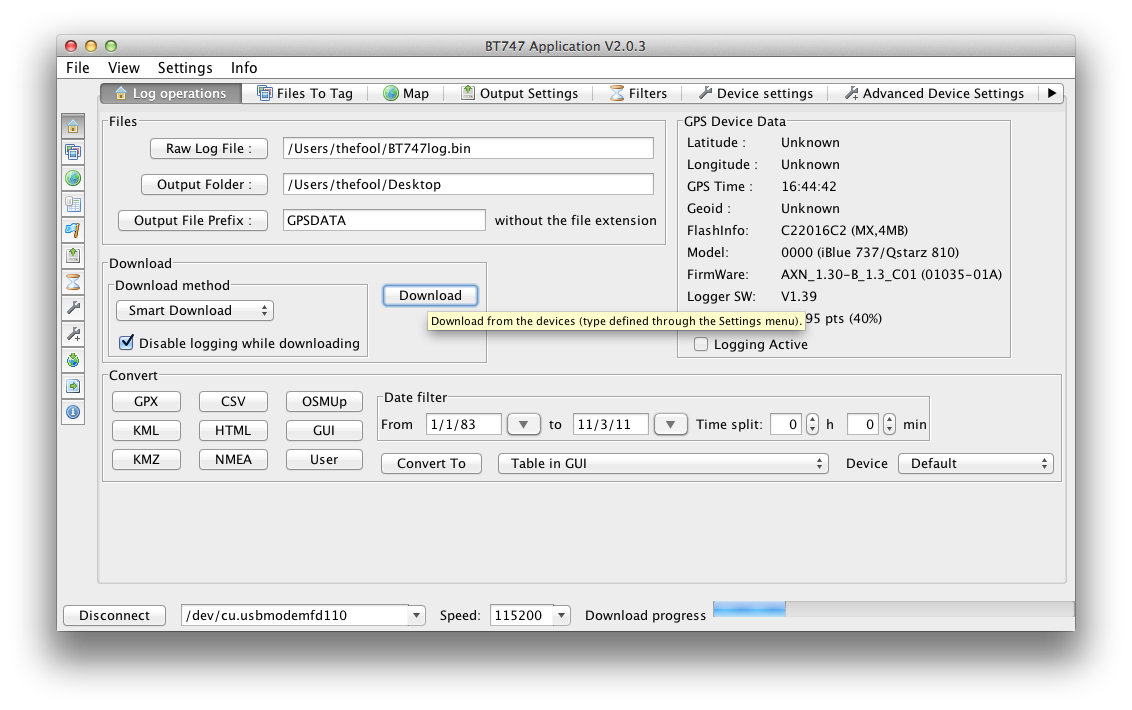
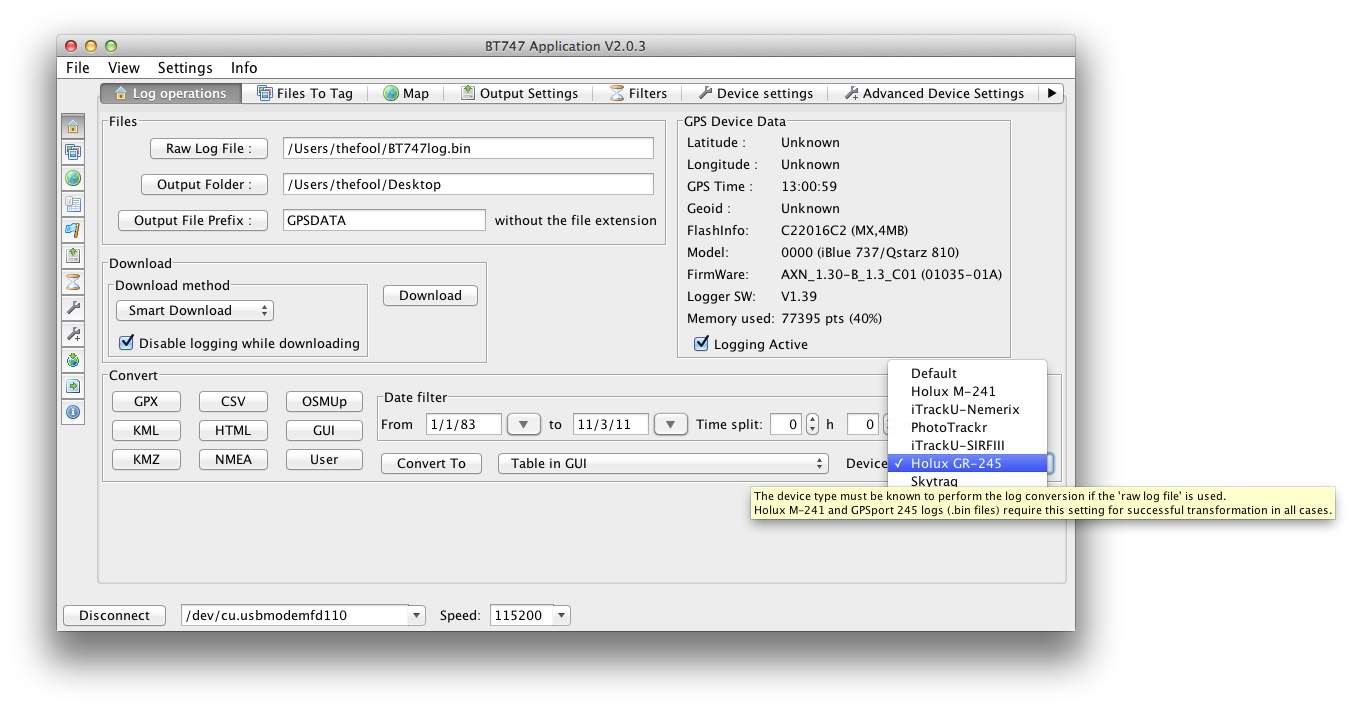
- Press the “Connect” button. The “GPS Device Data” in the top right part of the window should then fill up with information.
- In the “Files” section at the top left part of the window, choose your output folder, where the log files will be saved.
- Download the track data from the Logger, by pressing the “Download” button. This will get the Raw Log File.
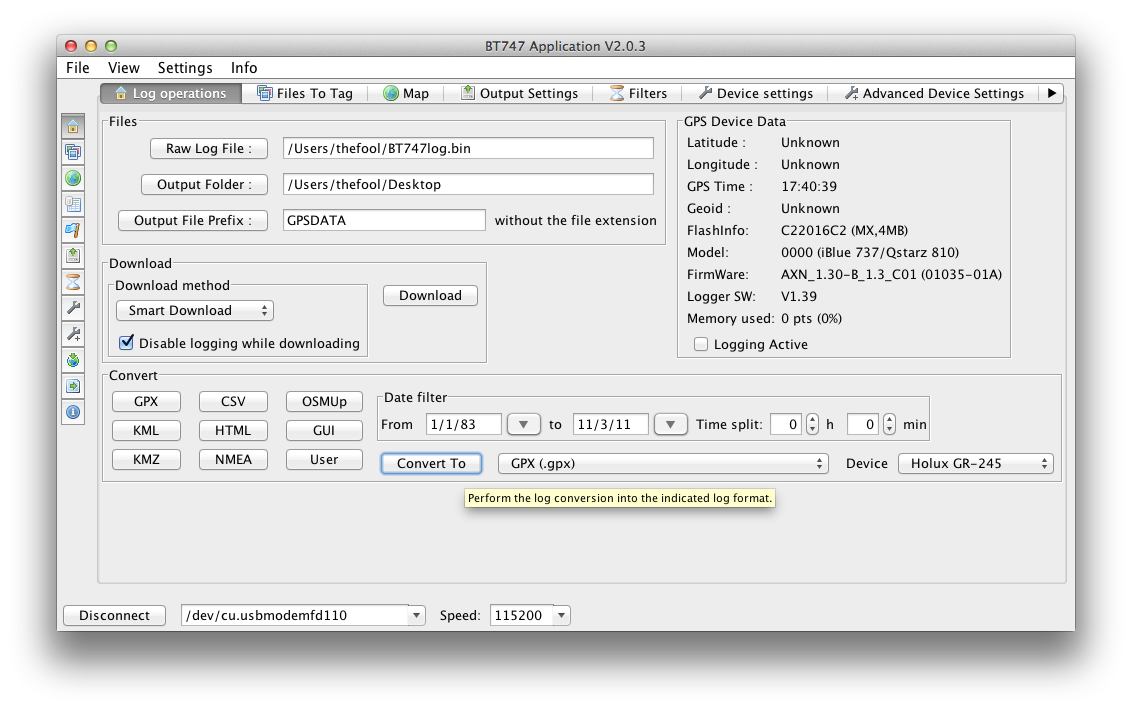
- To get a useful file format, in the “Convert” Section at the bottom of the window, at the very right, choose the Device type “Holux GR-245”. This is very important!
- Then choose the log format to convert to (GPX is probably the most widely accepted type – Aperture 3 can import GPX files).
- Press the “Convert to” button.
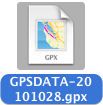
- You should now have a new file in the output folder you chose, and can import that into whichever software you want to use.
- A few possibilities are
Feel free to add your comments below!





Am trying to follow the above on OSX Yosenite. I used to have this working under Mavericks, but cannot get it to work with Yosemite. When I run the ‘bt747_macosX_j2se.command’ file I get a message saying I need to install a JDK. I have Java Runtime 8 already installed, so am not sure what the JDK is or what I should install.
Can you help?
Thanks
Hi,
Thanks a lot for your blog. I follow all your steps, i connect my m1000c, download the data but in the very end when i try to convert the data ( i select the gpx format and the gr-245) i always get a message that says that ‘no output files were created’. What can be wrong?
Thanks for your help
I cannot get the M-241 to show up as a connection in the Download window. Using BT747 v2.1.3 on OS 10.9 VERSION.
In Step #3, I am not getting the device to show up in Network preferences. Got the M241 turned on and connected directly to a USB plug on the Mac.
I own a Holux M-241. In Step 10, do I select the M-241 or the CR-245? 02Aug2014
Hi Luc,
I never had success with the Desktop version, but have not tried in a while.
You can start the .command file under mavericks by right clicking the file, then choosing Open from the menu that pops open. It’s a protection system to stop you from accidentally double clicking files that might potentially be harmful – apps that are not signed by registered developers.
Update:
I used the BT747 Desktop RXTX 2.2 and then the population of the serial port works, but with any one I use I get an error that its in use:
1382552 – Classgps.connection.GPSRxTxPort
Error: Port /dev/cu.usbmodem1410is currently in use
gnu.io.PortInUseException: Unknown Application
…
1382556 – Port opened
and the device data does not get populated.
So to my understanding I now have the ports but can’t connect.
Any suggestions?
Hi,
I can’t get the Holux M-1200E connected to my mac. (MBP OS X 10.9.2)
When I connect the USB cable nothing happens, and when selecting the menu option to populate the serial ports, nothing gets added.
Is there any specific driver or SW required that would enable this?
I was also only successful in installing the desktop version from the main site. When trying to use the zip-ed version I don’t have apparently the right authorization to run the .command. Although Im the admin of the laptop and when I look at Get Info, I have the max rights.
Any suggestions? Much appreciated!
@Michel: you should not select the M-241 for the conversion, this might mess up your altitudes. Instead you should use Holux GR-245, as I describe above.
Hi buntesegel,
Try this I done for my M-1000C …
One in the parameter menu / protocol –> Holux M-1000C / GPSport 245 for the communication between the computer and the GPS.
An other one (on the far right of the convert button), in order to select the correct file format for the conversion. And for the M-1000C, the M-241 must be selected …
Well done, very useful!
Awesome directions. Thanks very much.
I have been able to load the program and connect the Holux 1000C. It does download the track but when I try to export it it tells me there were any filter set prohibiting the export (not matter what export format is used). Any solution to this?
Thanks
Awesome writeup. Thanks for the suggestion to use the ZIP vs. the web installer. That fixed it up for me. I need to get more familiar with all the options but at least now I can get to my tracks!
Extra tidbits:
I have successfully used GPSBabelFE (on OS X) to download off my Holux (but there’s no option to do smart downloading as with the above BT747 solution). Note that after following the above steps, your next step (if you’re a Mac user like me) might be to use GPSphotoLinker (to apply the .gpx to your pics).
GOOEY DETAILS?: I just drag my raw NEF (Nikon) files onto one window, load up the above-creaed .gpx file, use the AUTO tab, select all the pics and start processing. THEN, I load them into LightRoom (LR). I suppose an intermediate step worthy of study is to clean up the gpx track before using it, smoothing it out with gpsbabel.
GOOEY THOUGHTS2: If you ALREADY have your pics in LR, just save the META data to files (LR>Meta>SaveMetaToFiles) and THEN use gpsphoto, and THEN reload the metaData.
cheers.
-shawn
If you’re having problems connecting,.. don’t forget to TURN YOUR DEVICE ON!
(since connecting the usb cable will start charging your device,.. you might think that the little green light that switches-on means you need do nothing.. not so!.. Turn on the device!
heh heh.
Very helpful – thanks so much! A very roundabout process, but awesome that it works!